Geek Hack 60 Mechanical Keyboard
The GH60 is an open source 60% keyboard that is very popular amongst mechanical keyboard enthusiasts. I was excited to finally have a chance to build one when I needed a new keyboard for work. All I needed was to decide on… everything about the keyboard. I needed to choose a switch type, a keycap profile and colors, a case, and firmware to use.
Keycap Profile
Choosing the profile was quite easy, there were only three options that I actually considered. Those were the OEM profile, which is on most keyboards. And the other two profiles that are common and available.
There was also the option of DSA, which is flatter than OEM.

Or there was SA which is much more sloped and curved than OEM.

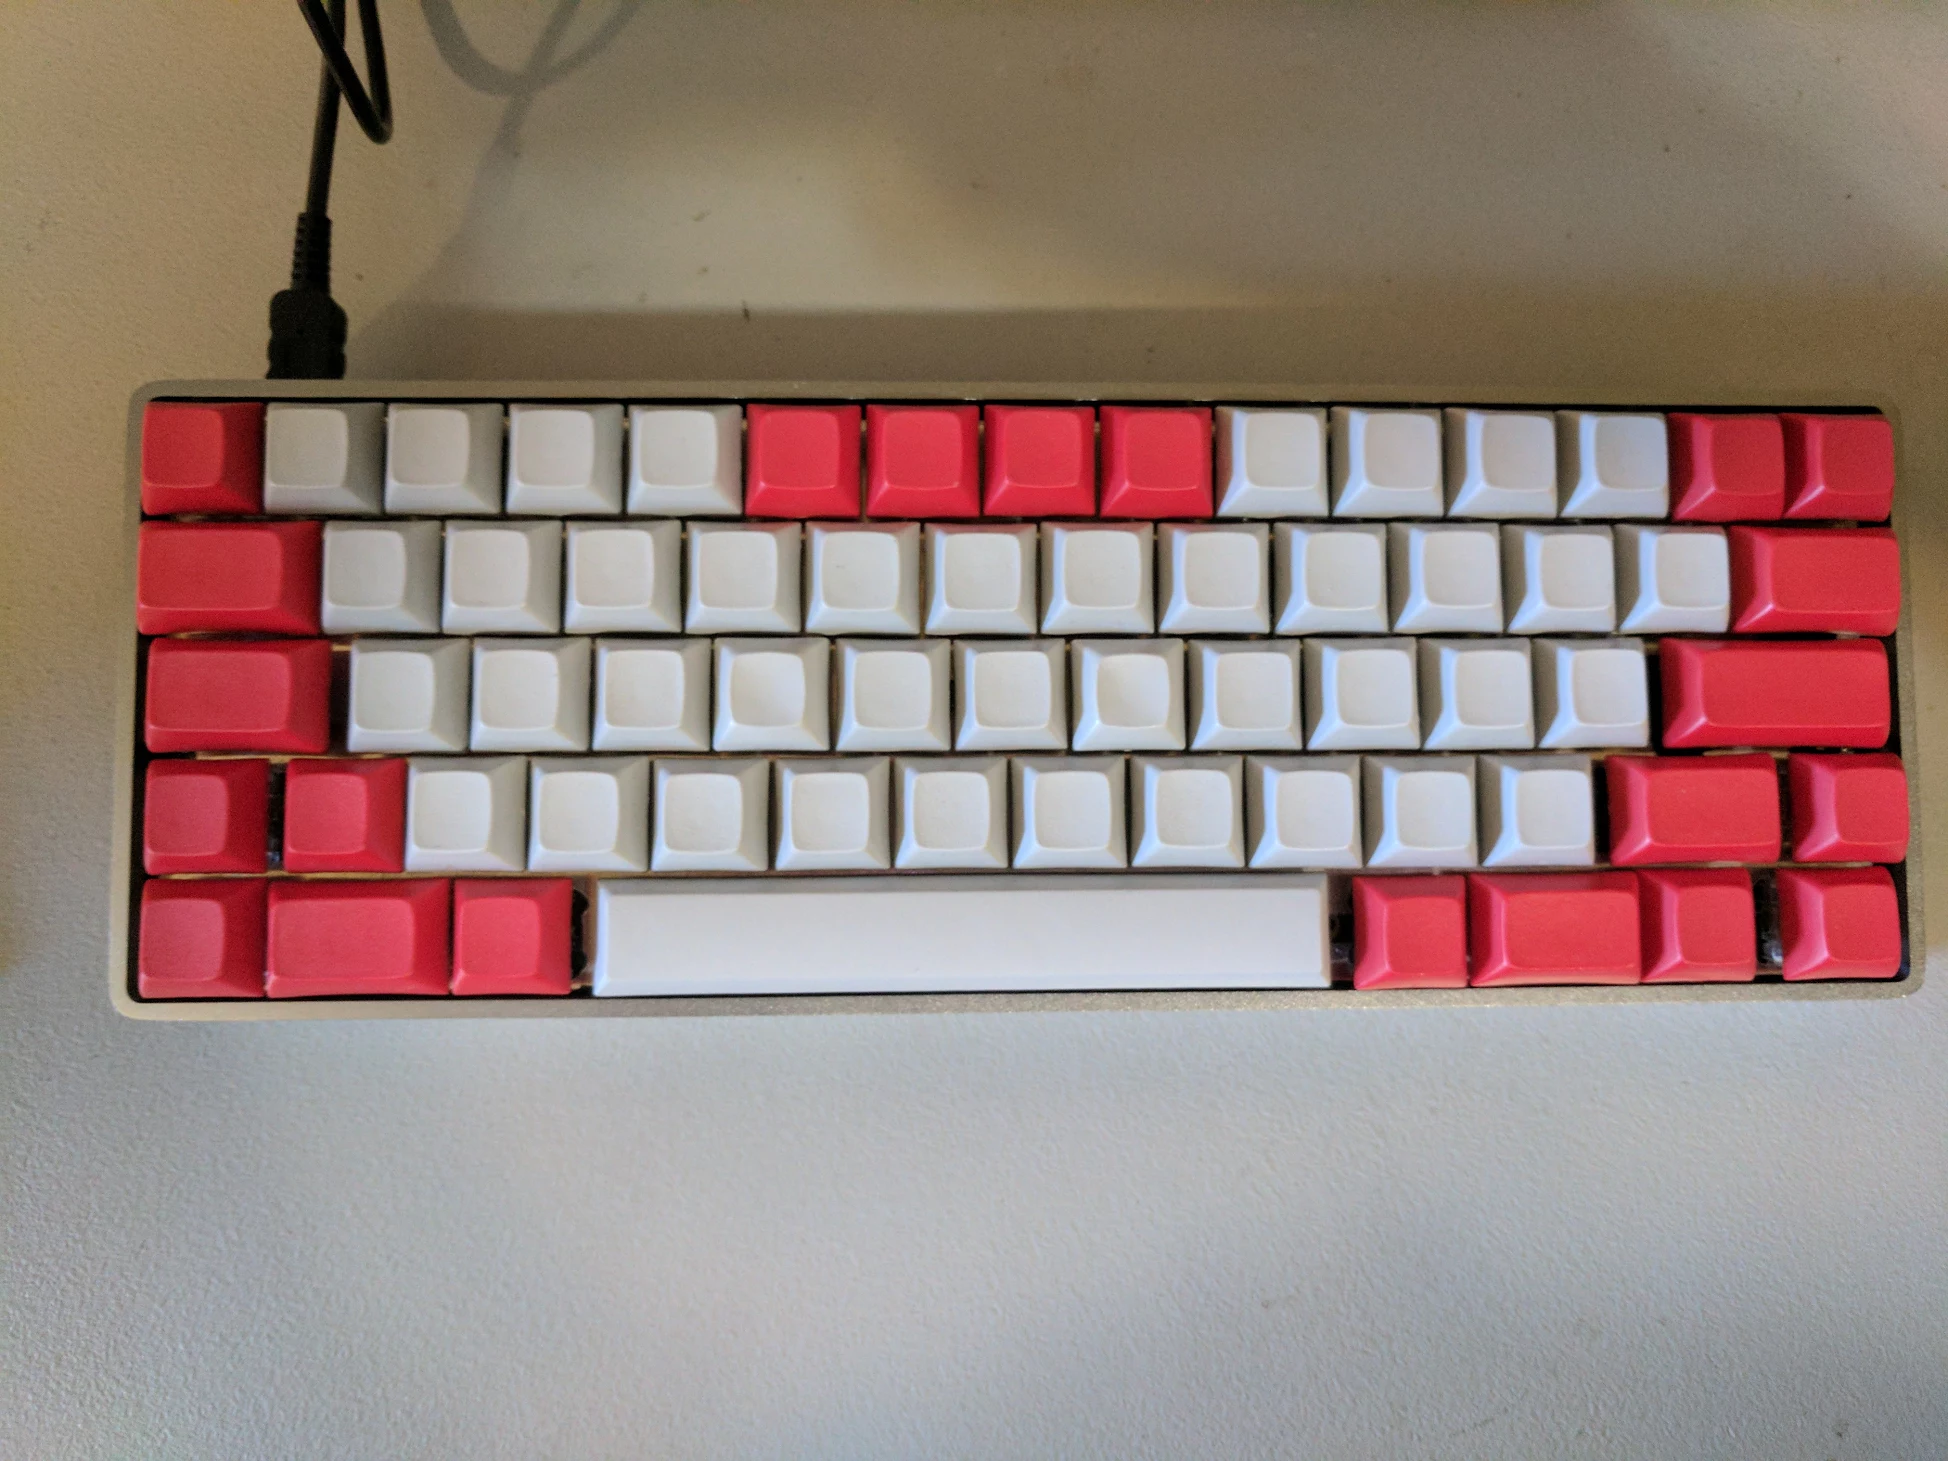
I went with DSA because the flat keys are interchangable and are cheaper than most of the SA sets.
Switch Type
I knew that I wanted to go with a cherry style switch, but there are several options there. I could go with linear switches, tactile switches or clicky switches. I personally don’t like the feel of linear switches, so I needed decide between clicky and tactile switches. I figured that since I was going to be using it at work, I would avoid the loud clicky switches.
Now that I had decided on tactile switches I would still have a bunch of options. I could go with cherry browns, or Gateron browns, both a good option, but in my opinion the tactile bump is too small. That left me with Cherry clears which are very hard to come by, modified clicky switches like jailhouse blues, or a less popular switch manufacturer. After searching through reddit and geek hack forums I found the Zealios switches which were created by a notable member of both communities. These switches were a great choice for me because the tactile bump is very pronounced, and the springs are quite heavy compared to most switches. Now that I had picked out the switches and keycaps I was ready to put the board together.
Assembly
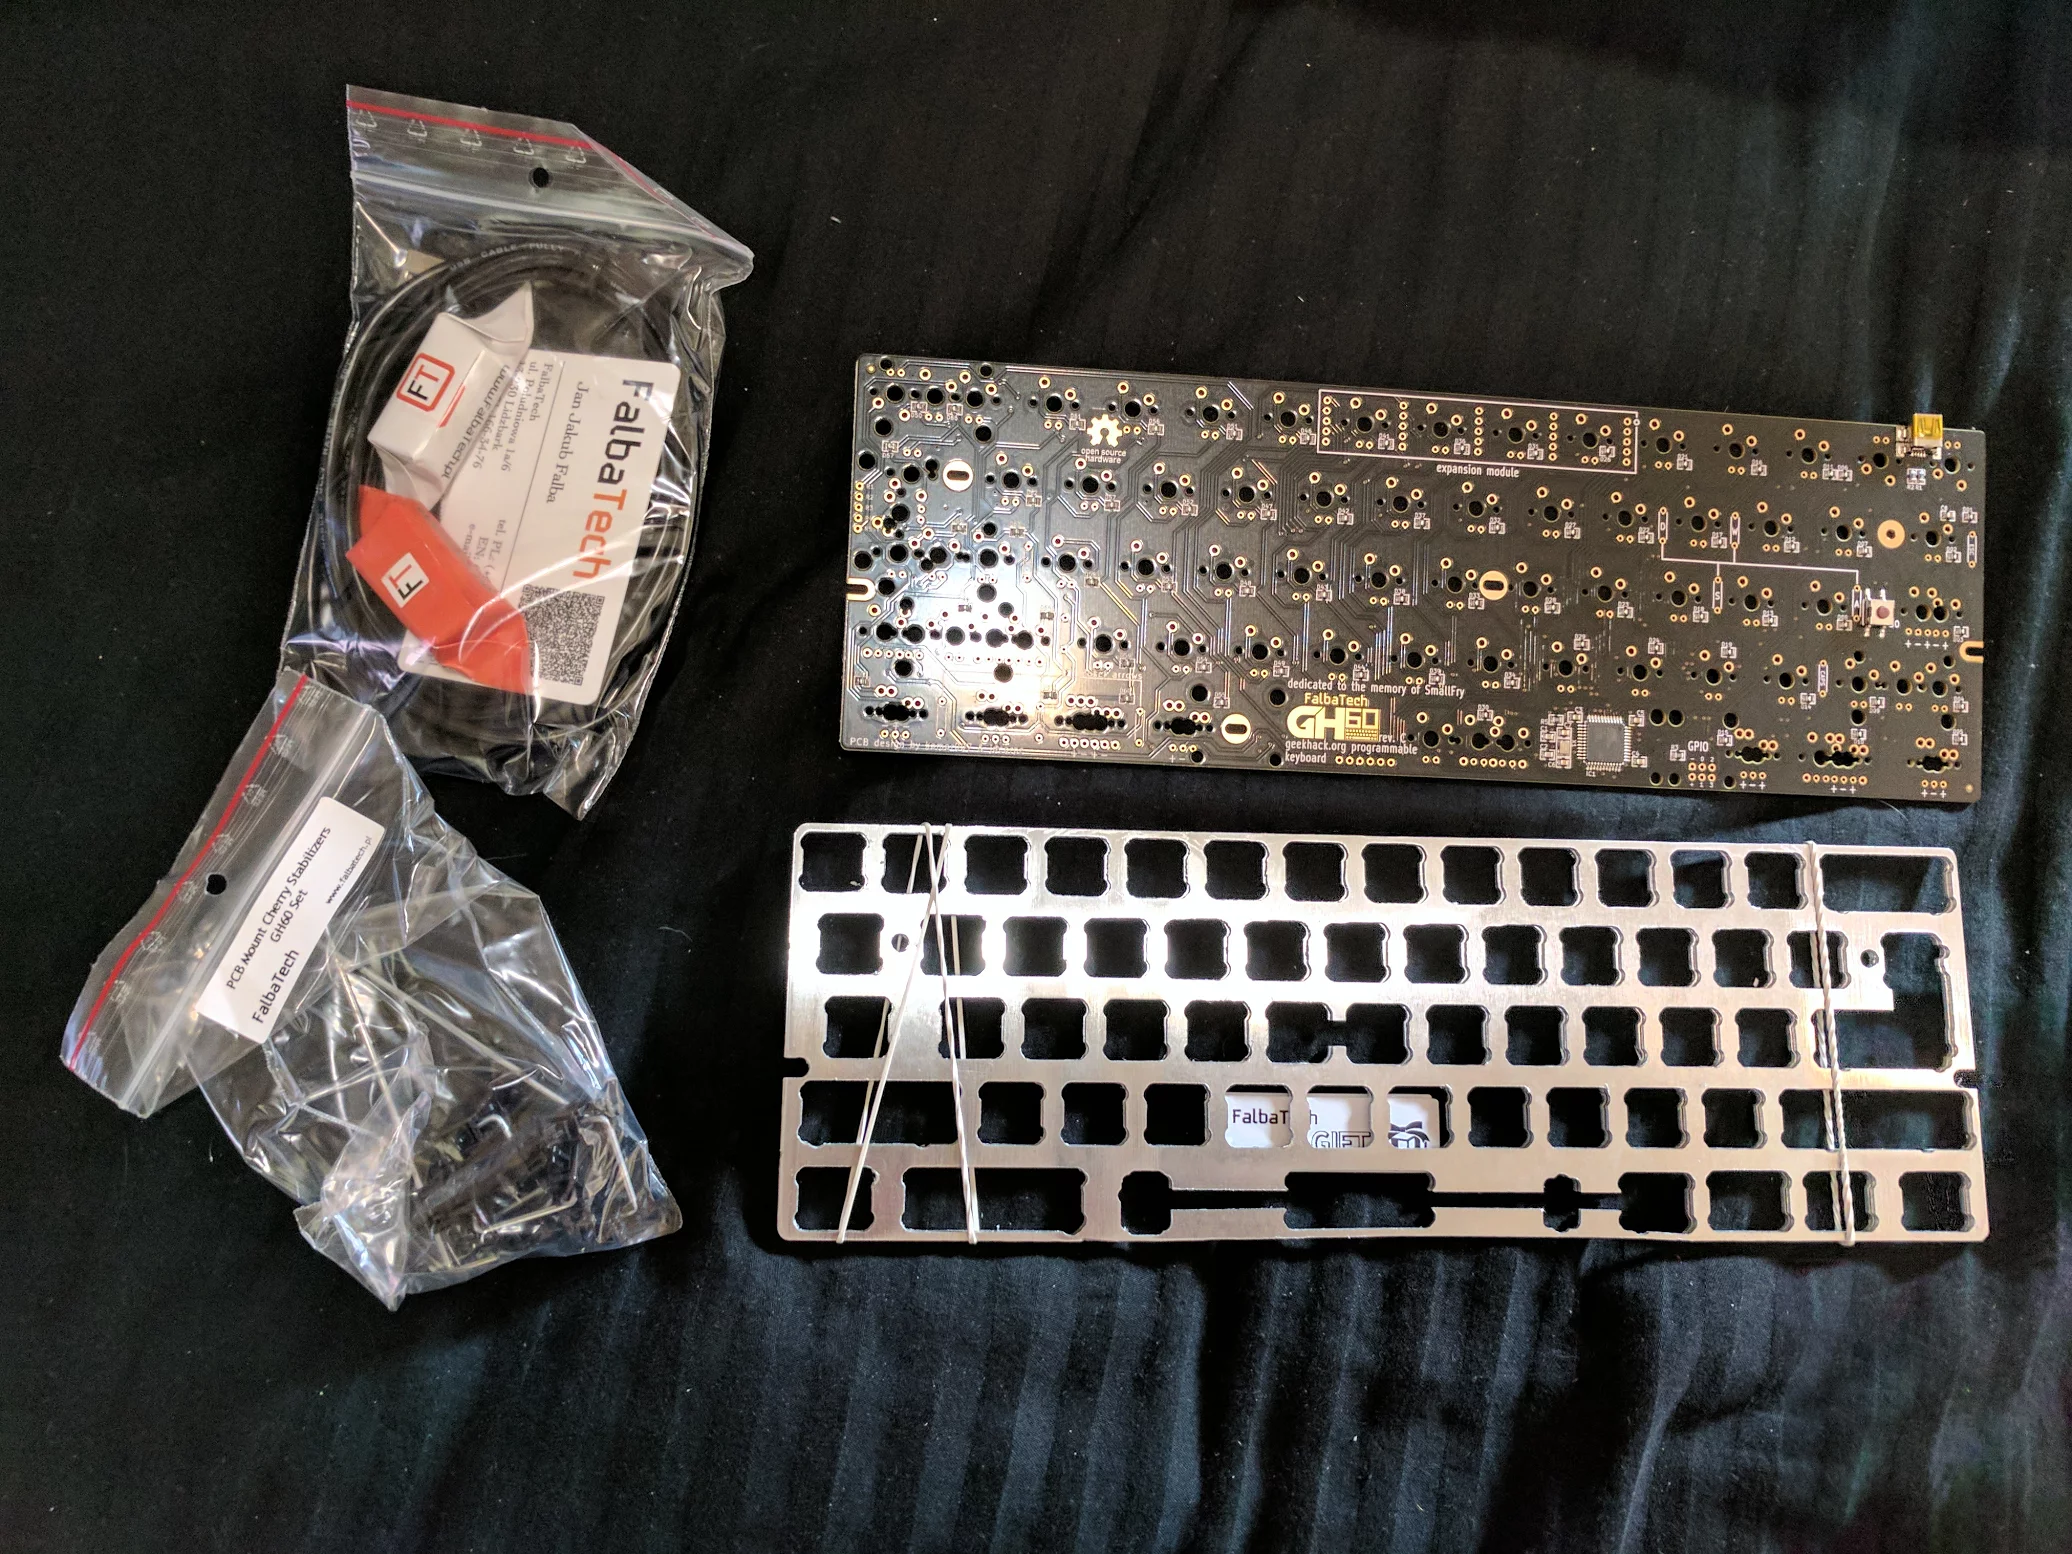
The first shipment got here with the PCB and the plate to mount the switches.
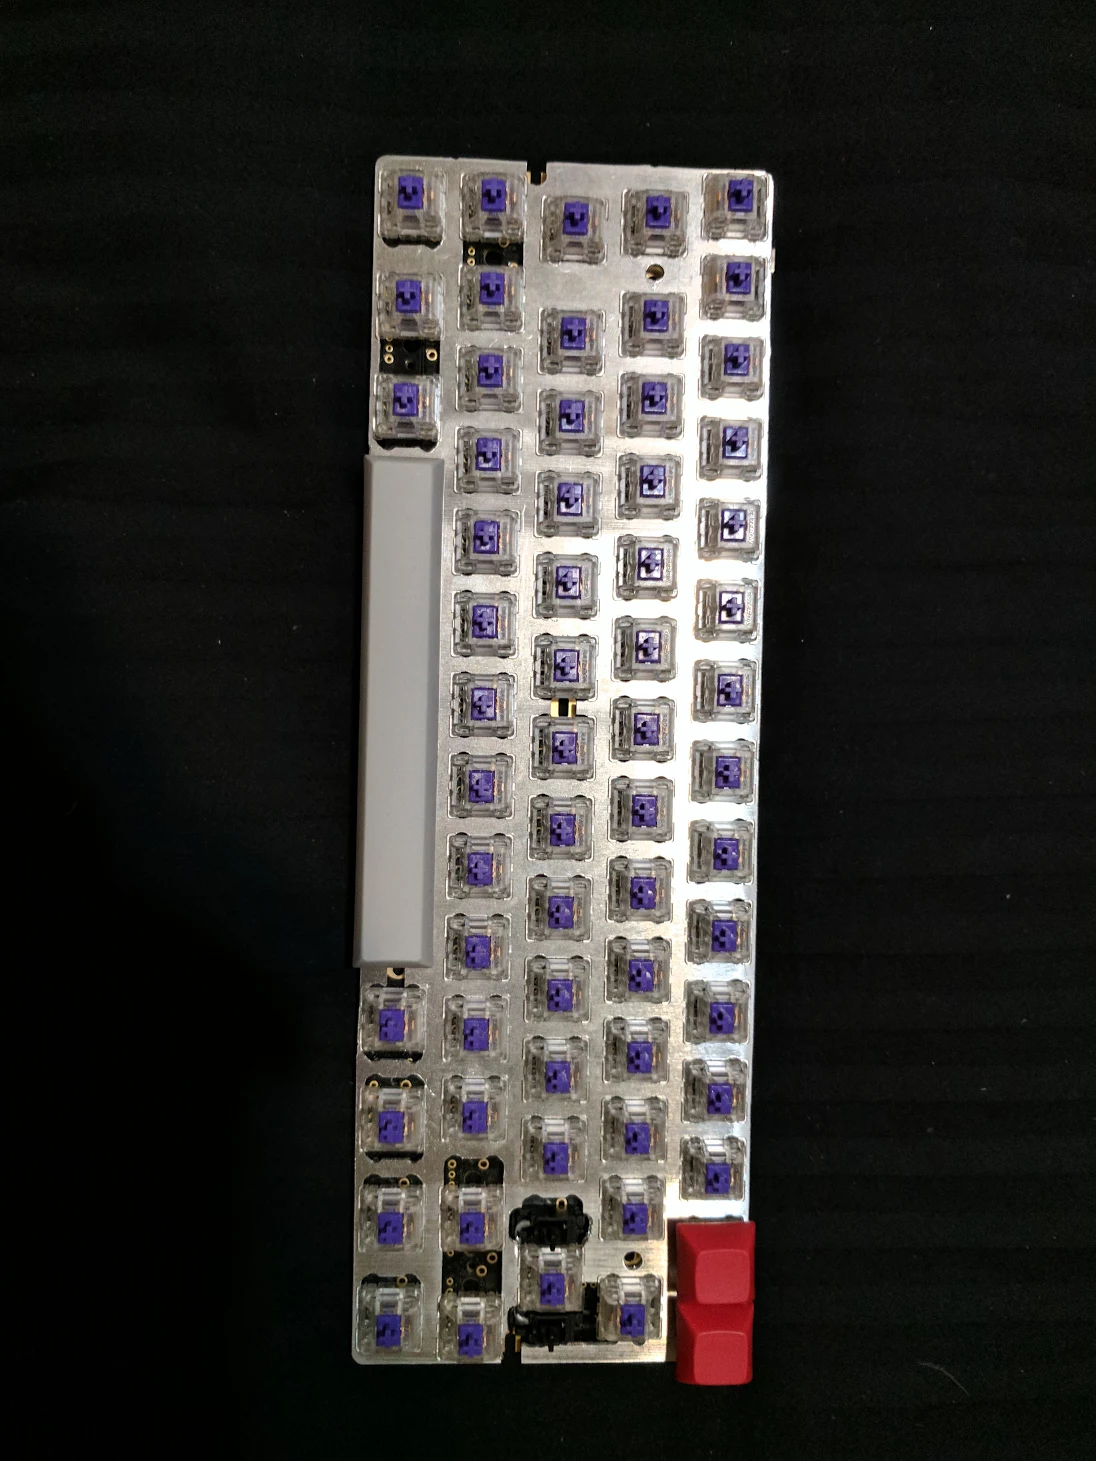
I stuck the switches in and threw a few key caps on.
The keycaps sounded rather loud, so I decided that I needed to silence them a little. I ordered rubber o-rings off of amazon to put on the keycap stems.
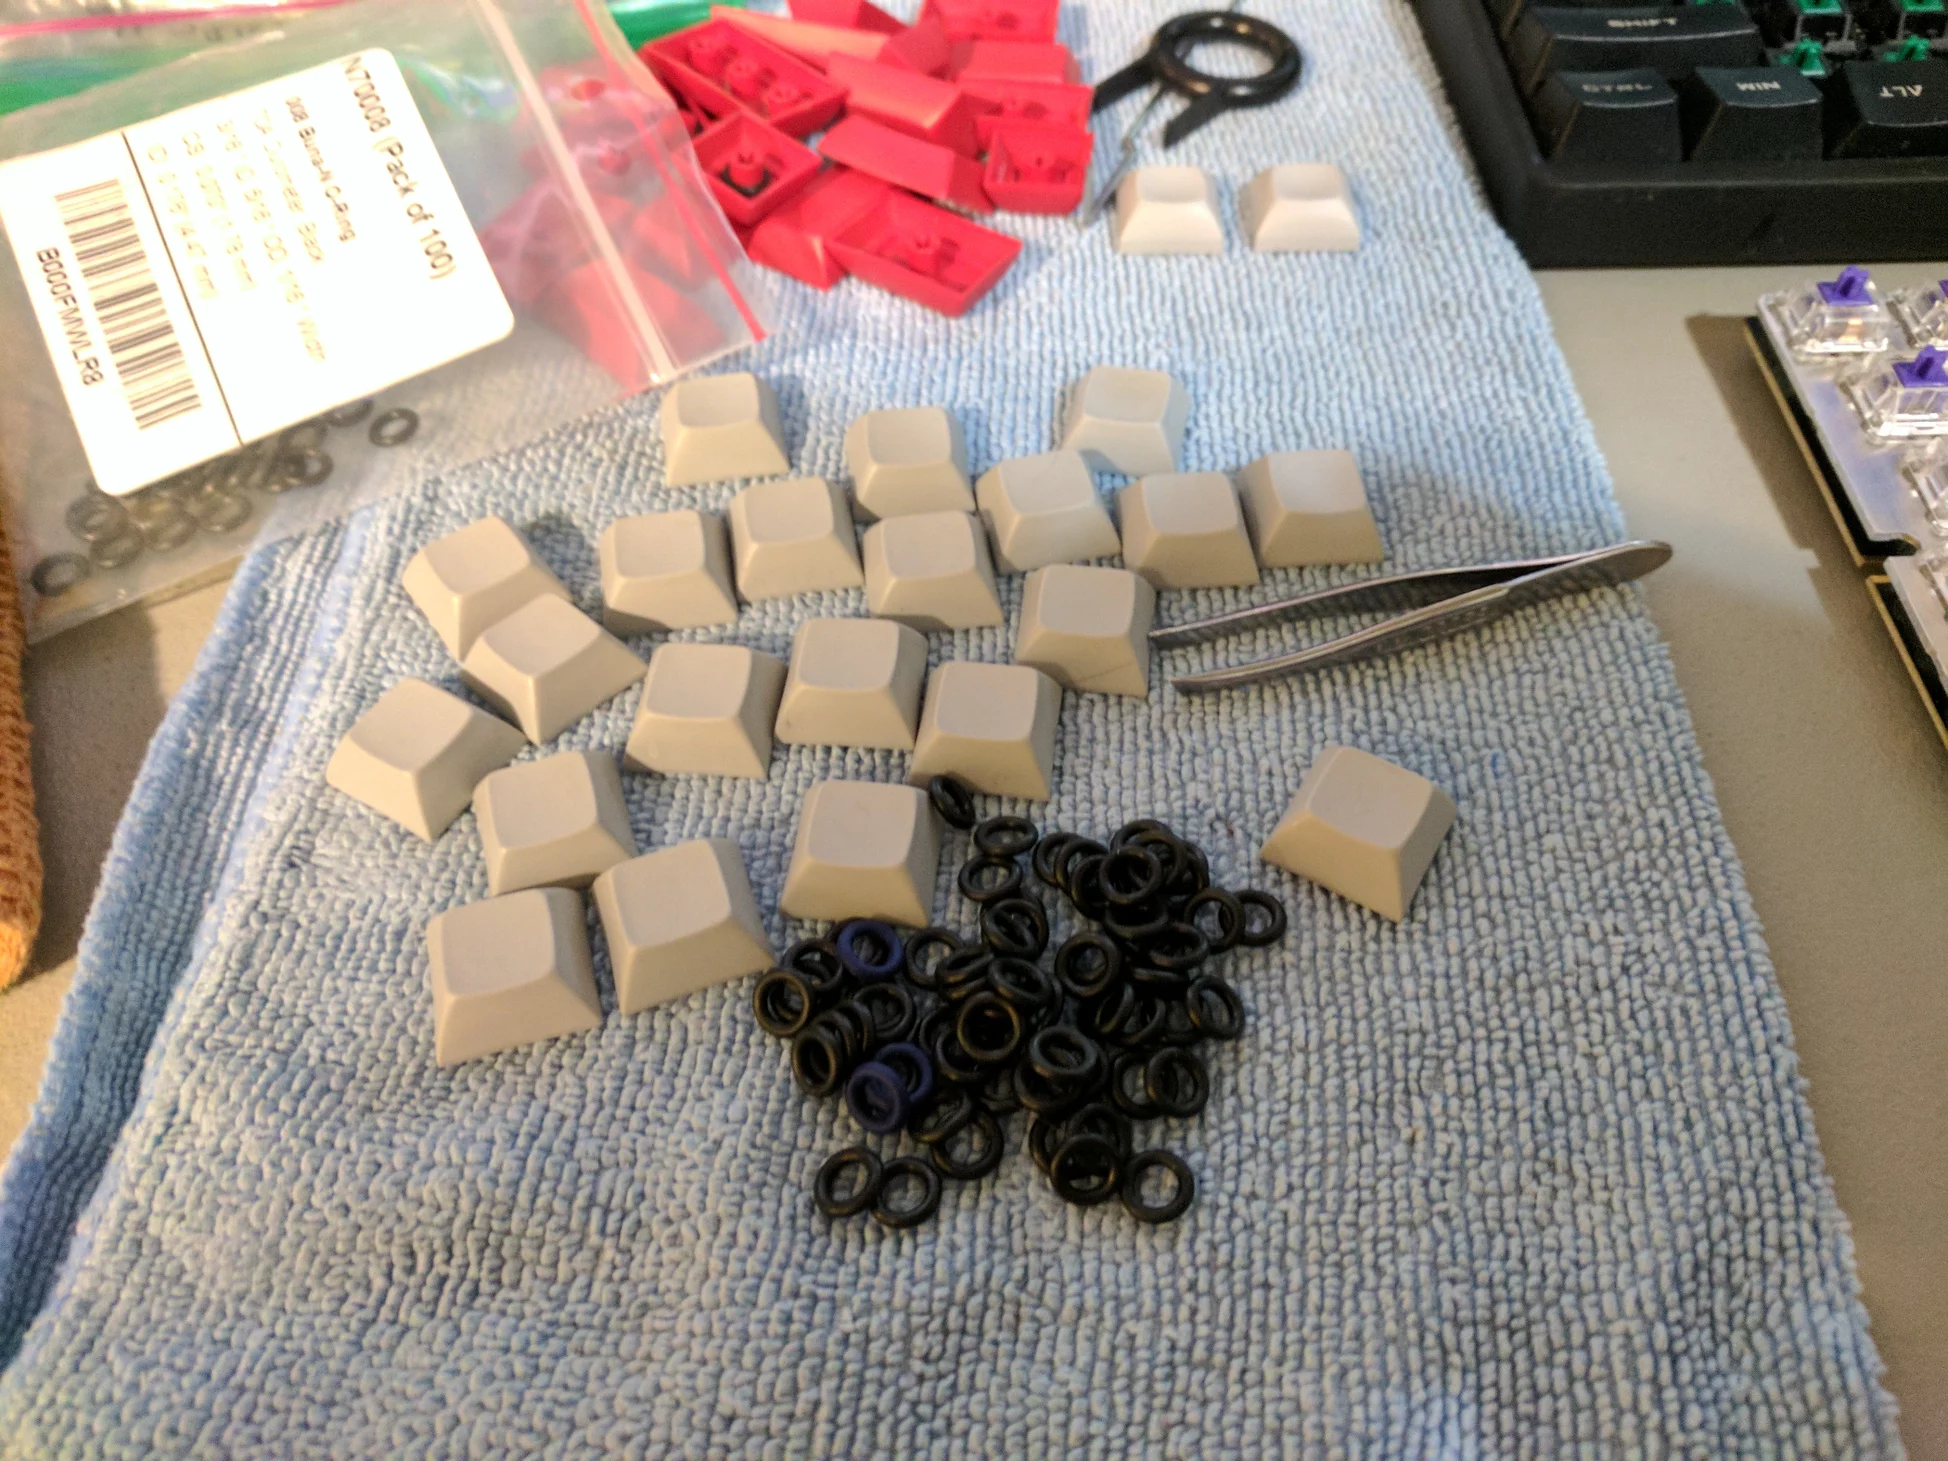
They prevent the switch body from hitting the key cap and making a loud sound. After adding them I noticed a significant decrease in sound that bottoming out the keys made.
Firmware
The keyboard was put together, but it was just a bunch of switches on a bord. I still needed to program it. I chose to base my firmware off of the TMK firmware because I had past experience with it. The layout I have been using is available here I added the vim movement keys to the keyboard and banished the pesky caps lock key for a more common key to be used. The layout has been very nice to use, and I am commonly upset when my home keyboard does not offer the same functionality that this keyboard does. So much so that I actually brought the new keyboard home to type this blog post (along with write some code for a personal project).
Finished Product